Everything you need to know about lens filters
11 minute read
A few good lens filters rank highly in the hierarchy of photography accessories, and sooner or later, you’re going to need one. Here’s everything you need to know about polarisers, NDs and more.
We’ve said it before and we’ll say it again – you don’t need a whole host of gear to be a good photographer. With that said, a few key accessories can be a real blessing, and up there at the top of the list is a good selection of filters.
The best accessories have real practical value, and filters are no exception. Beyond that, though, they can unlock some great creative potential.
Let’s get into the types of filters, what they do and how to use them.
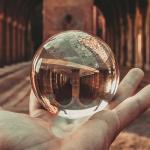
The polariser filter
“If you can buy only one filter, make it the polariser.” That’s Photography News editor Will Cheung’s advice, anyway, so we’ll start there.
In certain situations, a polarising filter can cut through glare and reflections, which can be immensely beneficial. As a result, colours can look more saturated – particularly blue skies. But how do they work?
Without getting too deep into the science, polarised light is light that bounces off an object in a specific direction, resulting in glare. Rather than reducing all light like an ND filter – which we’ll cover next – a polariser only reduces polarised light.


There are two types of polariser filter: circular and linear. This doesn’t refer to the shape of the filter itself, but how they polarise the light. Linear polarising filters aren’t all that common these days and aren’t recommended for use with a digital camera, given that they interfere with autoexposure and autofocus. Unless you want to be stuck with manual settings, opt for a circular polariser.
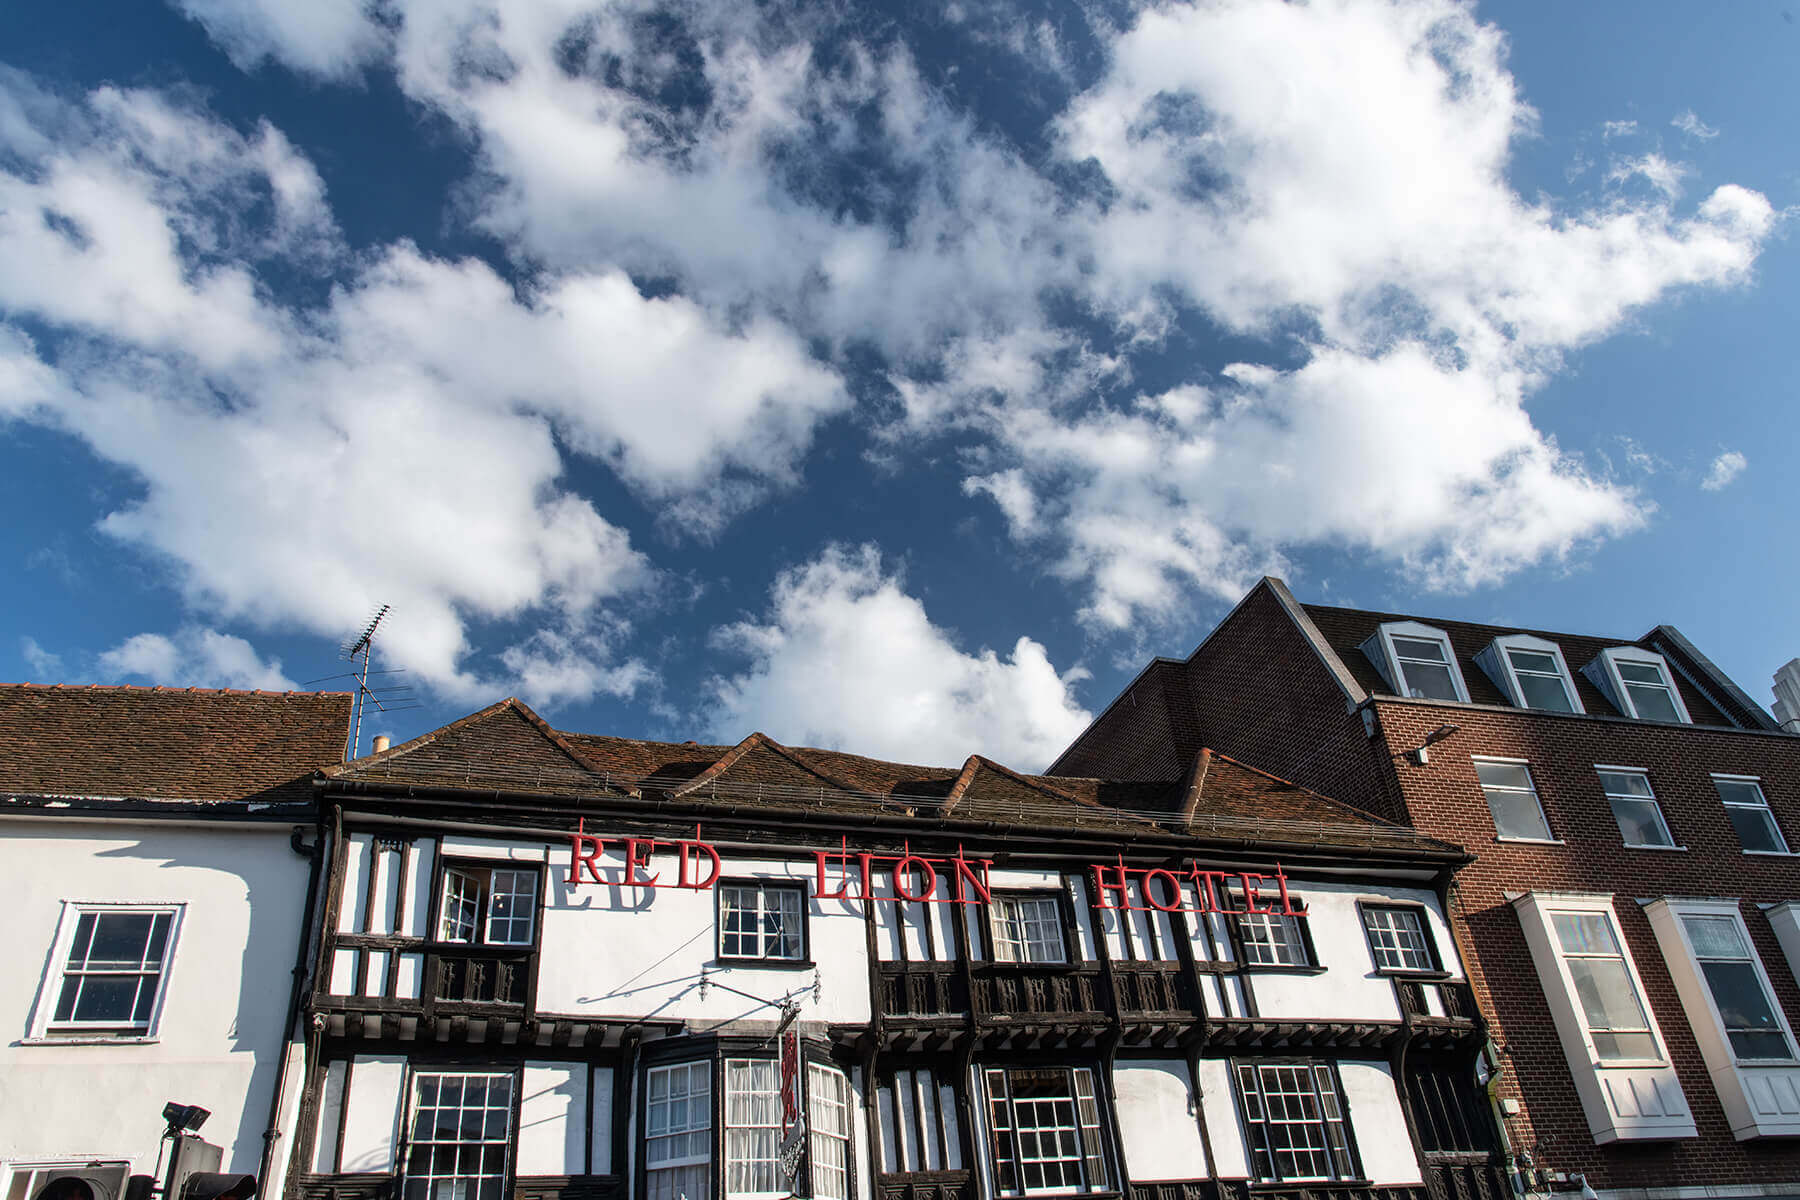
We mentioned that polarising lens filters only work in certain situations, and that’s important to remember during use. On overcast days, a polariser won’t have much effect – it really only comes into its own in direct light. It’s not a good idea to leave it on regardless, though, as a polariser has a slight ND effect that will affect your exposure settings.
Even in appropriate bright conditions, polarised light still varies, and with it, so does the required degree of polarisation from the filter. This is usually altered by rotating the filter.
The polarising effect is greatest when facing 90° to the sun and, when using a wide-angle lens, the effect is often visible in the sky. The area of greatest polarisation will look darker and more saturated, as seen here.
The neutral density filter
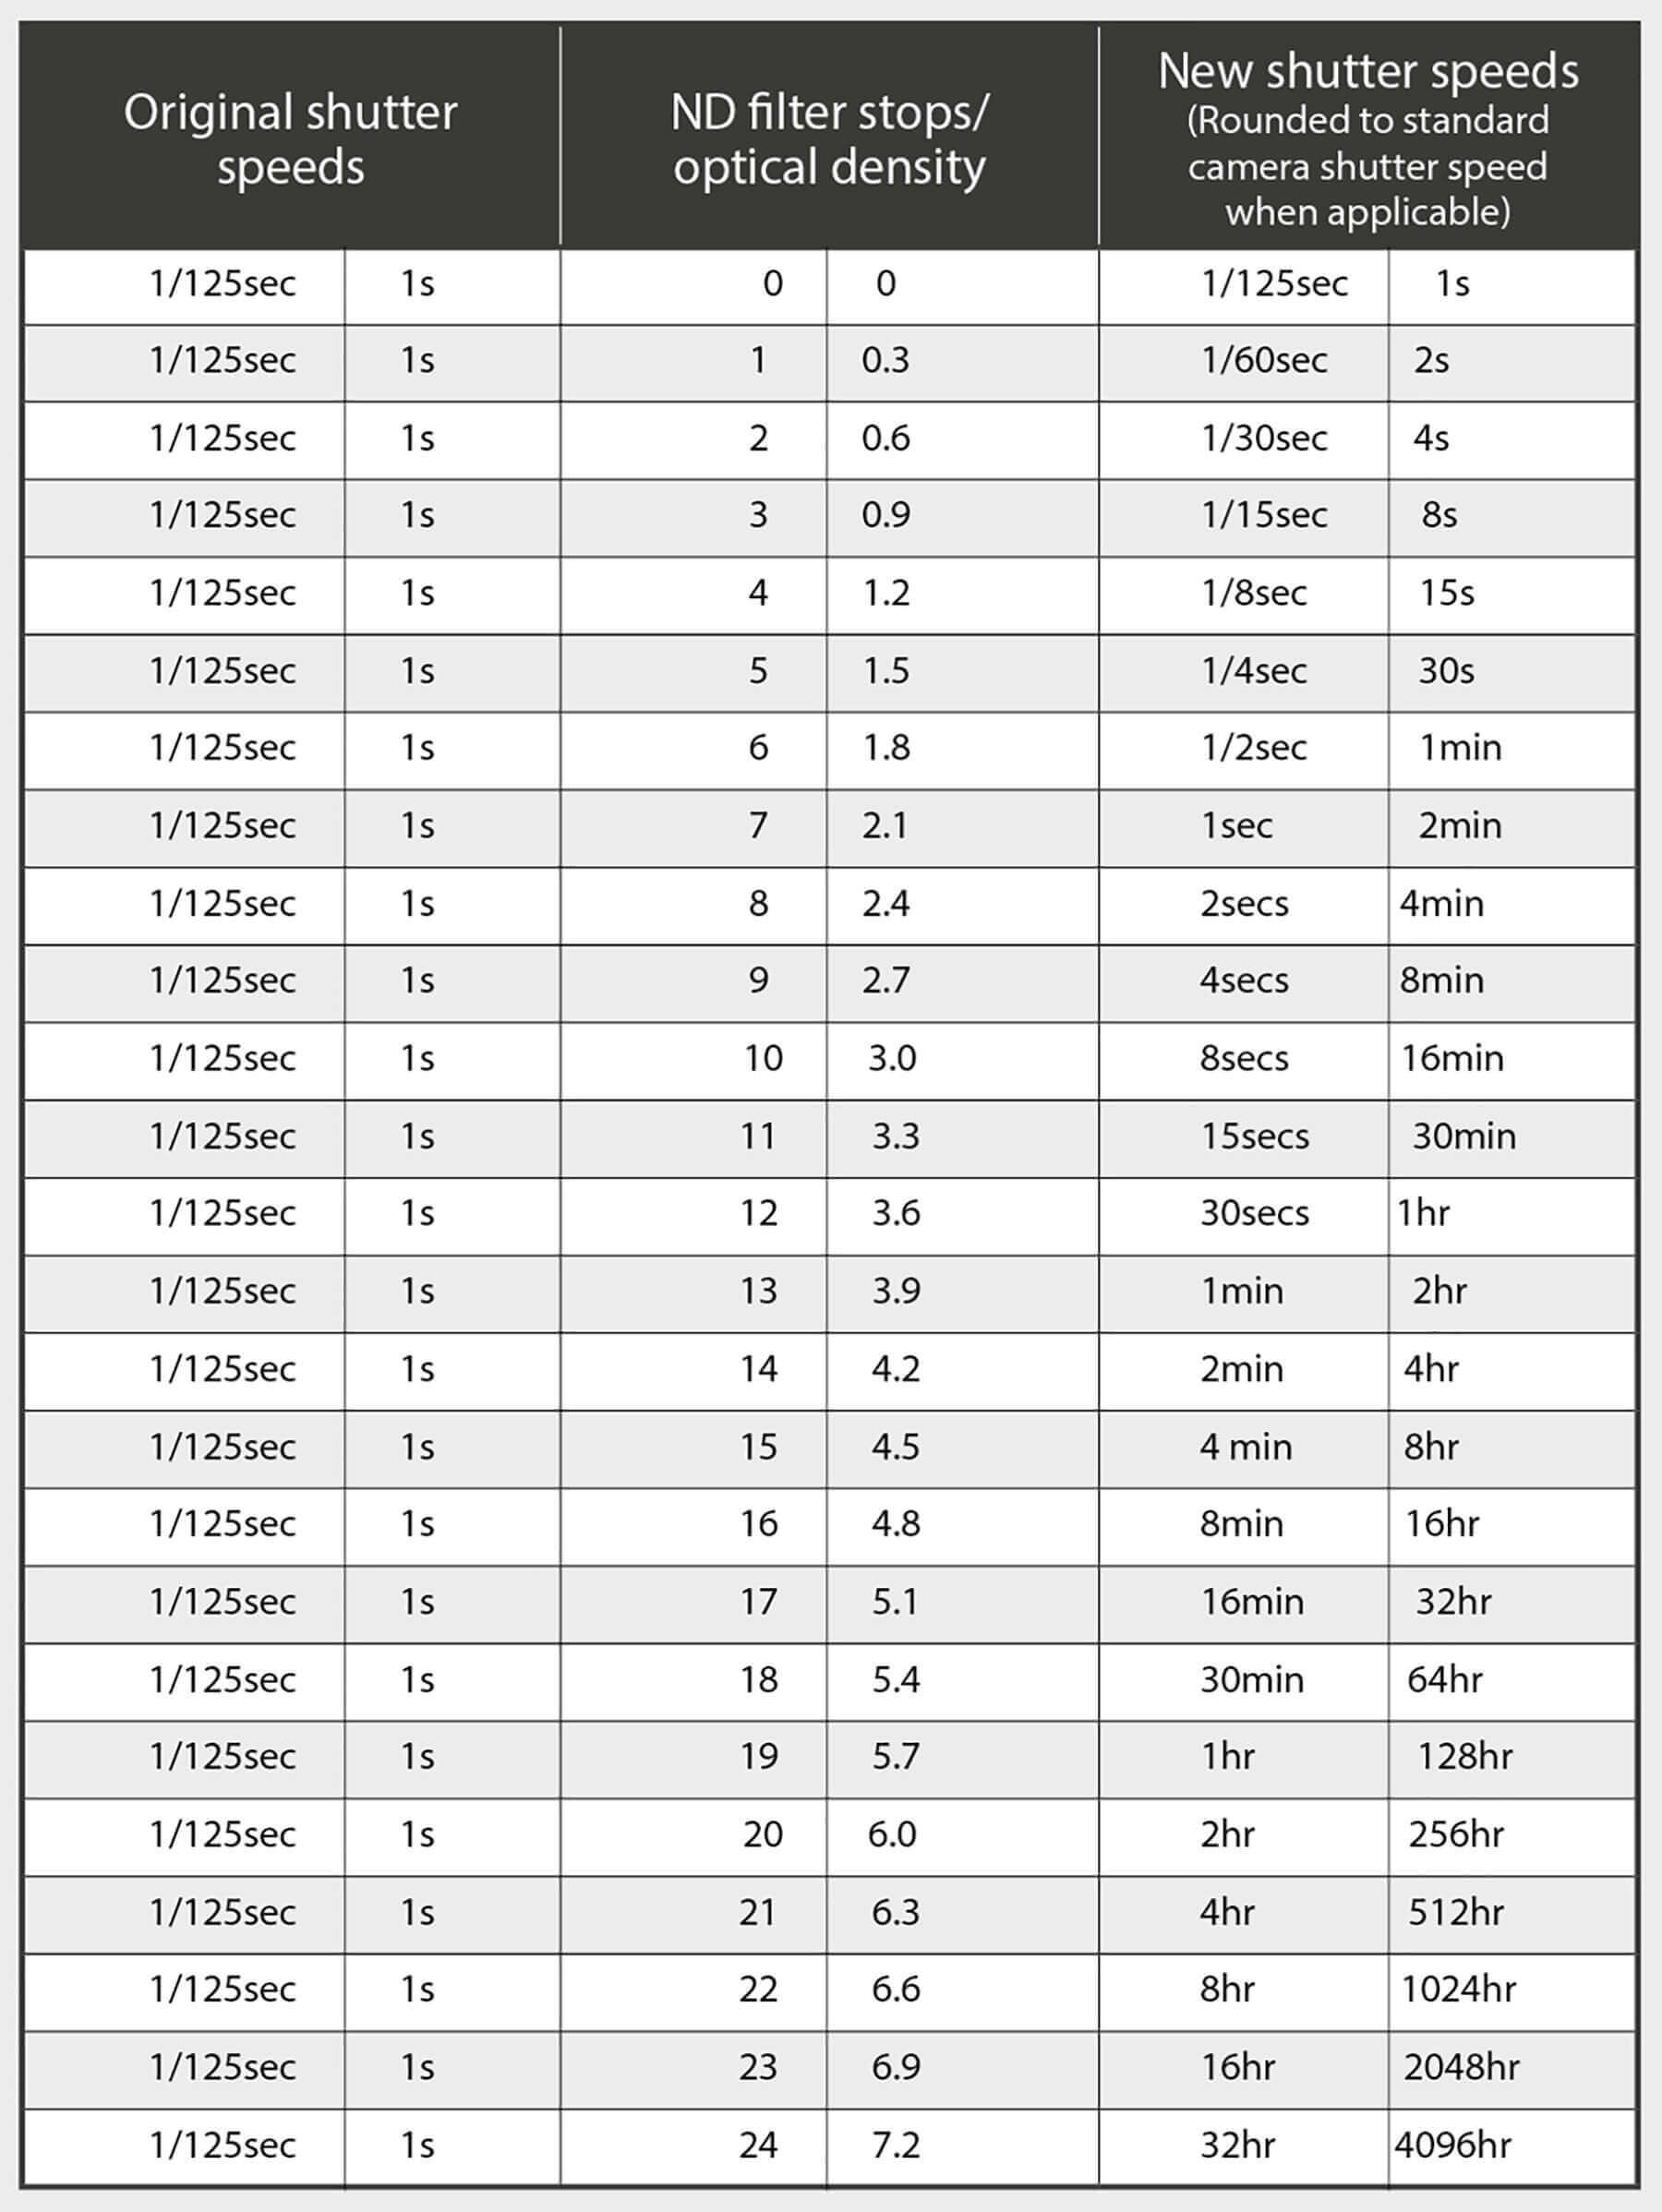
Second place on our list goes to the neutral density filter. ND filters reduce the overall light, like sunglasses for your lens, and come in various strengths. An ND2 filter reduces light by 1EV, for example, while the strongest ND filters reduce light by 15EV or more.
The result of this reduction in light is the ability to use a broader range of exposure settings. With an ND filter, you can use apertures and shutter speeds that would lead to drastic overexposure without it, such as those needed for long exposure photography or a shallow depth-of-field.
We’re not going to get too caught up in figures here, because there’s a huge amount of them, but we do have a table of shutter speeds to aid your understanding.
Variable ND lens filters are also an option. This means the degree of light reduction varies, usually with a twist of the filter, just like the polariser. Just be aware that issues can arise when using a variable ND filter in conjunction with very wide or very long lenses.
The graduated ND filter
Having learned what an ND filter is, a graduated ND filter may speak for itself. There are a few new considerations, though.
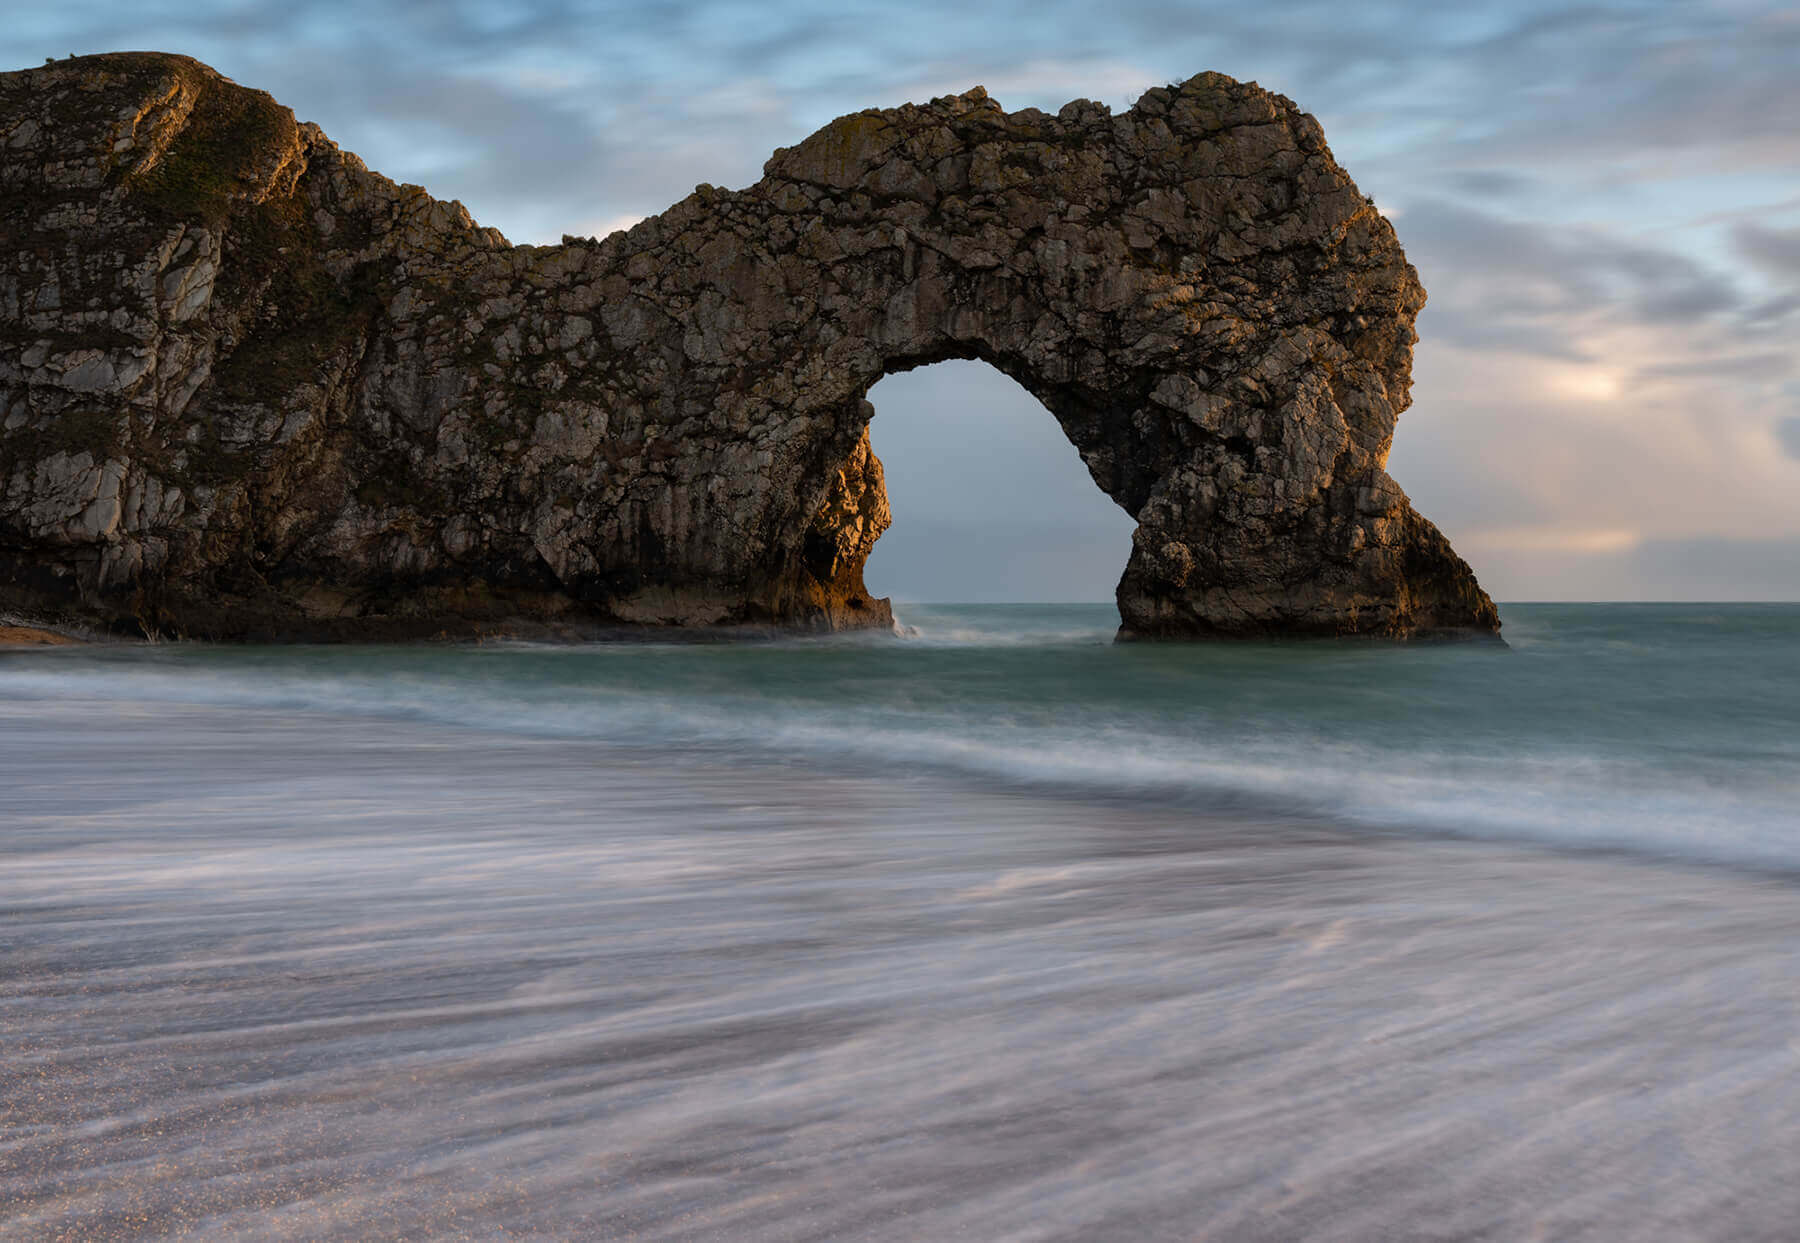
Simply, a graduated ND filter is half clear and half coloured. These are perfect for maintaining detail in both a bright sky and a darker foreground when photographing a landscape.
Like normal ND filters, the grad filter is available in varied strengths. They also vary in graduation, with either a soft gradual tonal change or a hard and easily distinguished tonal change. The former is better for a more cluttered horizon with trees or buildings, while the latter is better for a solid horizon such as that of the sea.
Click the images to see a larger view


Using a graduated ND filter is a little more complex than using a normal ND filter, because you have two different exposures within the same frame – that of the foreground and that of the sky. This will require use of an EV chart.
First, take an exposure of your foreground. You can use a light meter for this, or you could put your camera into semi or full autoexposure mode and use its built-in spot metering mode if it has one. Then, take a meter reading of the sky. The difference will dictate the strength of the graduated ND filter needed.
For example, if your foreground meter reading was 1/125sec at f/8 (13EV) and your sky meter reading was 1/125sec at f/22 (16EV), you’d need a graduated ND filter with an optical density of 0.9 to balance the 3EV discrepancy.
This may sound complex, but it’s fairly simple once you’ve got the necessary charts. Just remember, meter both parts of the scene, check the EV difference, then check the strength of the filter needed.
The light pollution filter
The function and usage of a light pollution filter is very specific. They’re used when photographing at night, commonly during astrophotography, though really, any night scene could benefit from one at least somewhat.
Much like the polariser, the light pollution filter blocks specific types of light. In this case, the specific yellow and green hues of man-made light such as street lamps. The effect of a light pollution filter can be replicated in post to some extent – certainly more so than the effects of a polariser or ND filter can be, and as such, they’re less common.
If you spend a lot of time shooting astrophotography or night scenes, the light pollution filter is worth looking into, at least for the time it can save you editing.
The protective filter
The protective filter does exactly what it says it does. For that reason, and although it doesn’t have any creative or practical benefits to your photography, it could be argued that it’s the best investment of all.
Many protective lens filters are branded as UV filters, though the extent of the UV filter’s usefulness on a digital camera is still up for debate. At very least, though, they protect the front element of the lens from debris and scratches. So, if you’re the type of photographer that doesn’t like lens caps (or loses them easily!), this is a great investment.
The protective or UV filter is the only one on the list we’d recommend attaching to your lens for the long haul – at least most of the time. If there are any negative effects such as lens flare, the filter can be removed for the shot, then replaced.
Screw-on filter v filter holder
One significant factor that we haven’t covered so far is how the filters actually attach to the lens. When it comes to this, there are two options: a filter that directly attaches, or a filter holder.
The first is the more basic option. It’s typically cheaper, there’s less to carry and it’s simpler. There are pitfalls, too, though.
The most significant is that the screw-on filter has to be the correct size for your lens’ filter thread. This means you can’t share filters between lenses with different thread sizes – without a step-up adapter that is. Even with an adapter, you can only scale down in size. A smaller filter on a larger thread-sized wouldn’t allow for full coverage of the lens.
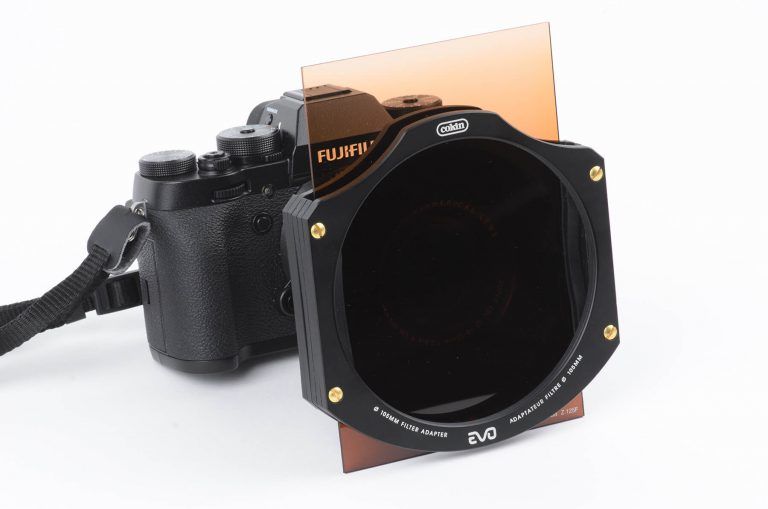
The second option, the filter holder, does exactly what the name suggests. It attaches to the lens with an adapter ring, then allows one or more glass or resin filters to be slotted in or screwed on. These filters are typically large rectangles, but many holders accept circular filters, too.
The added versatility is the real benefit here. Adapter rings are cheap, and one filter will work with almost any lens, which is particularly beneficial if you have a large lens selection or a lens with a particularly large front element.
Another benefit is that, given their greater coverage, large rectangular filters are less prone to vignetting, even when stacked.
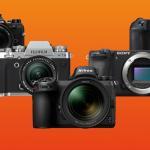
Purchase suggestions
With Photography News approaching triple figures, we’ve tested countless lens filters and holders over the years. You can read about every one of them in our issue library if you’re so inclined. For the sake of ease and time, though, here are just a few of our favourites.
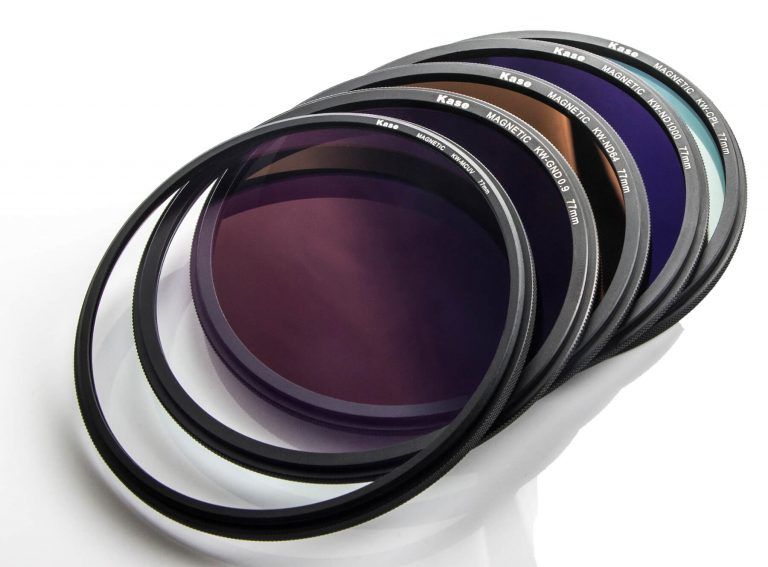
Kase
If independent reviews are anything to go by, the Kase Wolverine series filters are some of the best optical performers on the market today. They’re also more durable than many thanks to a toughened glass construction, in addition to a scratch-resistant, water-repellent and anti-reflective coating.
The Kase Wolverine series includes every type of filter mentioned above, and are available as magnetic circular filters or as kits with a filter holder.
Kase’s entry-level kit includes the K8 holder, 100mm rectangular ND and grad filters, a magnetic polariser, adapter and step rings, and more. Though described as entry-level, it’s clearly advanced kit and this is reflected in the price. The kit can be bought for £350 on the Kase website.
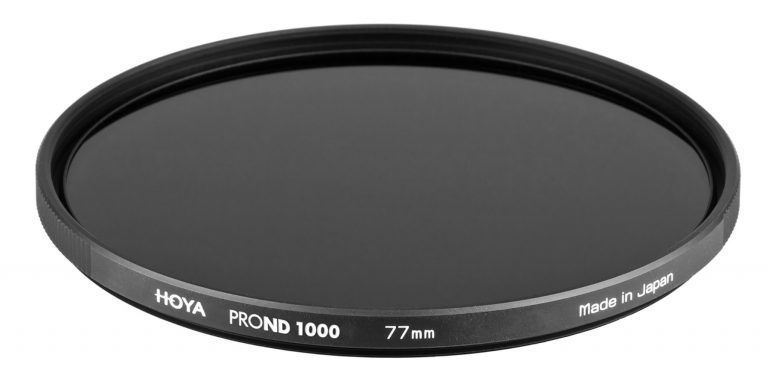
Hoya
Hoya filters has been an industry favourite for decades, offering a huge range of products. Its filters include general filters like polarisers and ND as well as more creative options such as close-up filters, starburst filters and multi-image filters.
There are also options when it comes to price and quality, with series’ for both enthusiasts and professionals. Screw-on circular UV, polariser and ND filters retail on Wex from around £30, all the way to £100 and more for the Ultra-Pro series filters.
Cokin
Cokin is another well-respected name in the photography world and we’ve had a number of the brand’s filter systems through our hands over the years. It’s fair to say you’ll find what you’re looking for within Cokin’s host of filters and, once again, there are options for photographers of all levels.
A number of systems are available, including the new Evo range, which couples with the Nuances Extreme filters for professional results. On the other end of the spectrum, the P400 P holder can be bought with an adapter ring for just over £30 on Wex. A pack of three ND filters (ND 2, ND4 and ND8) can also be picked up for £50.99.
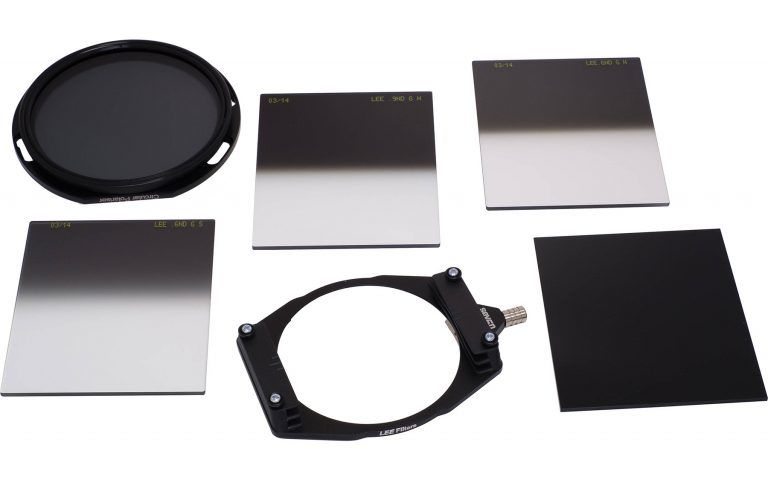
Lee Filters
Known as the masters of light for a reason, Lee Filters produces truly professional kit, without exceptionally high prices. Lee offers filters and holders for compact systems, standard cameras and ultra wide-angle lenses, with 75mm, 100mm and 150mm filters respectively.
The LEE100 holder retails for £79.95 on Wex, which is very respectable for a well-designed and easy-to-use system. 100mm polyester filters such as the 0.9 ND are available for under £30, while its high-end filters, including the ProGlass range, offer some of the finest quality on the market, and sell around the £150 mark.
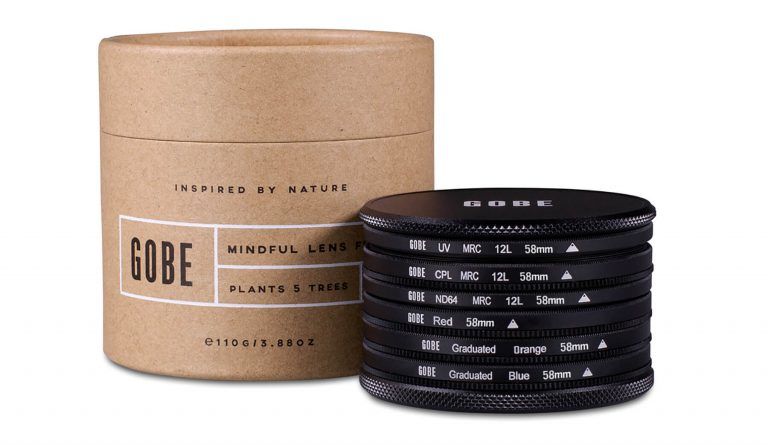
Gobe
These filters are different to the others on this list for one key reason: price. While the other brands mentioned above have options that aren’t excessively expensive as far as photography kit goes, Gobe offers the essentials for a real steal.
Gobe’s entry-level polariser costs as little as £18, with its variable ND2-32 filter going from £38. The Basics kit with a UV, a CPL, an ND64 and three other coloured filters can be picked up for less than £50 depending on filter thread size, too.
Despite the price tag, the majority of Gobe’s filters are made with quality optical glass, protected by an ultra-nano coating. We haven’t tested any of Gobe’s filters, so we can’t comment on their quality first-hand, but if your budget is minimal, it’s good to know that there are options like this one out there.
If you want to get to grips with more accessories, read our ultimate tripod guide. For more great tips, techniques and inspiration, take a look at our Inspiration section.
Don’t forget to sign up to receive our newsletter below, and get notified about the new issue, exclusive offers and competitions.